I am a huge fan of science units where I can visually show my students the content in action. It makes for some exciting lab and class periods! Teaching heat transfer is no exception. Typically when teaching about heat transfer, the biggest issue is vocabulary. Students struggle with the difference between conduction, convection, and radiation.
I want to share three tips for teaching heat transfer that will help students master the vocabulary and concepts, while also having some fun!
Tip #1 Practice, Practice…And Practice Some More!

As a teacher, you don’t need any reminding that practice is the best thing we can do for our students! That’s why I love task cards.
When teaching heat transfer, I have students practice the skills with task cards because it makes practice simple and easy. Students use them in stations, as a warm-up, and even those few extra minutes at the end of class.
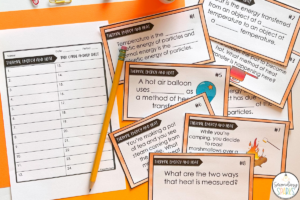
The Thermal Energy and Heat Transfer Task Cards can be used on paper or digitally. Each task card has a different scenario on it, and students have to identify which heat transfer method is occurring.
You can even turn this into a game! Read a scenario to the class and label each corner (conduction, convection, and radiation). Have students move to the corner that represents their answer! Then, have students explain why they choose that corner.
You can even turn this into a game! Read a scenario to the class and label each corner (conduction, convection, and radiation). Have students move to the corner that represents their answer! Then, have students explain why they choose that corner.
BUTTON: Get the Heat Transfer Task Cards
Tip #2 Explicitly Teach Heat Transfer

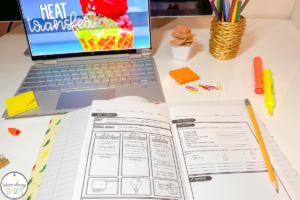
Explicit teaching makes concepts clear and concise for students. It’s also an opportunity to take notes, ask questions, and practice with students. During my explicit instruction, I have students use guided notes as I teach a mini-lesson.
Here is how I teach each concept to students –
Conduction – Heat is transferred through direct contact. Ex. a pot on a stove or sitting in a chair for a long time.
Convection – heat is transferred through a liquid or a gas. We talk about density a bit with convection. Warm air and liquid rise because it is less dense, while cool air and liquid sink. Ex. Boiling water and hot air balloons.
Radiation – Transfer of heat through electromagnetic waves. This is easier to explain once you’ve taught the Electromagnetic Spectrum. Ex. electric heaters and sunburns.
If you want in-depth resources to help you teach heat transfer, this Thermal Energy and Heat resource includes a PowerPoint, guided notes, and an assessment. Everything is made for you, so you can stick to teaching!
I also created a Mini-lesson Heat Transfer resource which includes a quick PowerPoint and guided notes. This is great for reviewing!
Tip #3 Teach Heat Transfer with a Lab

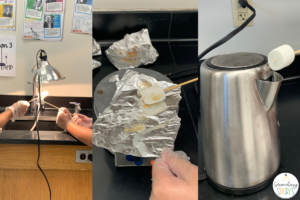
As I mentioned, I love a lab to help students visually see the concepts in action, and this science lab couldn’t be any more fun (and delicious). To teach heat transfer, students will conduct a S’mores Lab!
In this lab, students will melt marshmallows using a hot plate (conduction), a steam kettle (convection), and a heat lamp (radiation). They will observe and analyze along the way, while also seeing each type of heat transfer in action. Plus, they get to eat S’mores!

Hopefully you aren’t too hungry now! I hope these tips for teaching heat transfer are helpful. You can also read about how to bring choice boards to your science classroom here!

[…] If you don’t find time for this lab during your changes in states of matter unit, give it a try during your thermal energy unit. […]